Getting started with Knock In VIP Messenger communication assistant
At installation time, some functions of the Knock In (VIP Messenger) assistant are automatically launched and run in the background of the smartphone:
- Creation of the grid view of the address book contents
- Notifications processing and prioritization
All other functions of the Knock In assistant can be accessed and launched from the home screen.
Selecting the « VIP » contacts
At the first start, the Knock In assistant prompts you for selecting the VIP contacts from the grid view of the address book.
- You assign the « VIP » status with a short tap on the icon of each of the relevant contacts
- For each tap, a visual indication (a yellow circle) confirms the selection of the contact as a « VIP ».
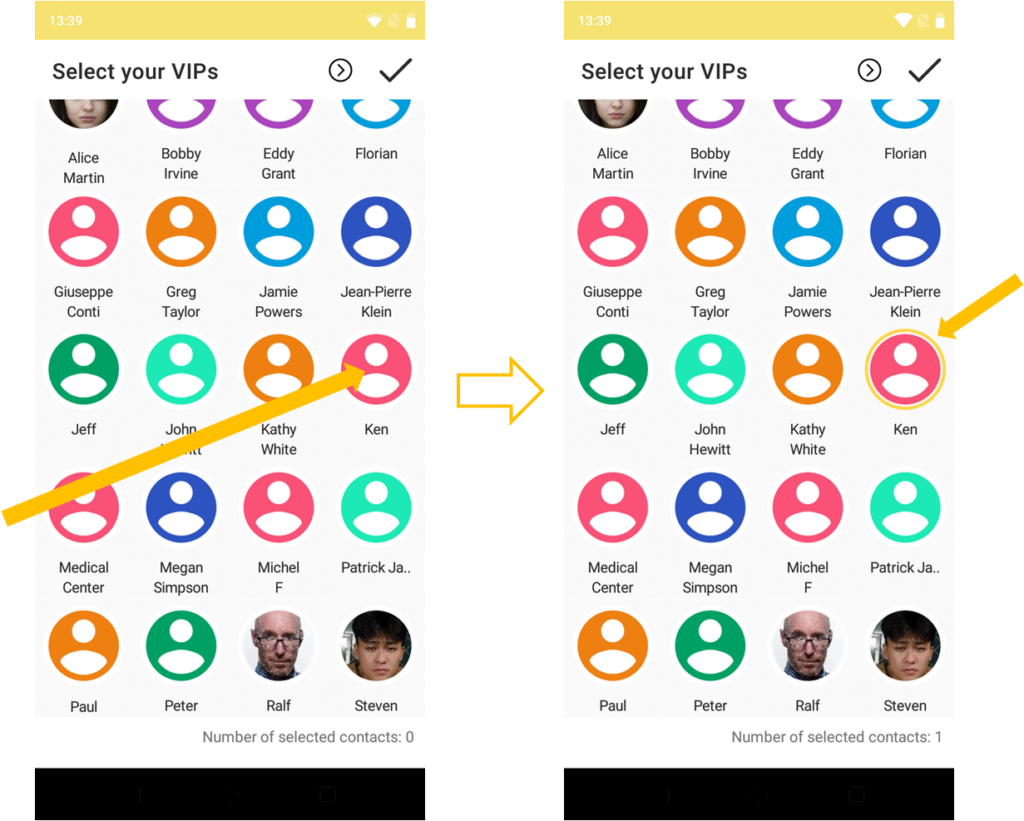
After the initial selection, changes in the choice of your VIP contacts (add or suppress) can be done at any time through the address book grid view screen (see below).
Grid view of the address book
Knock In offers you a more compact view of your address book contents. Several grid sizes are available, allowing best fit with your smartphone screen size and personal preference. In this grid view, the information attached to each contact (first name, name, phone numbers and e-mail @) are extracted from the smartphone address book.
You can modify this information as follows:
- A short tap on the contact icon displays the « edit » icon
- A short tap on the «edit» icon brings you in the « contact details » screen.
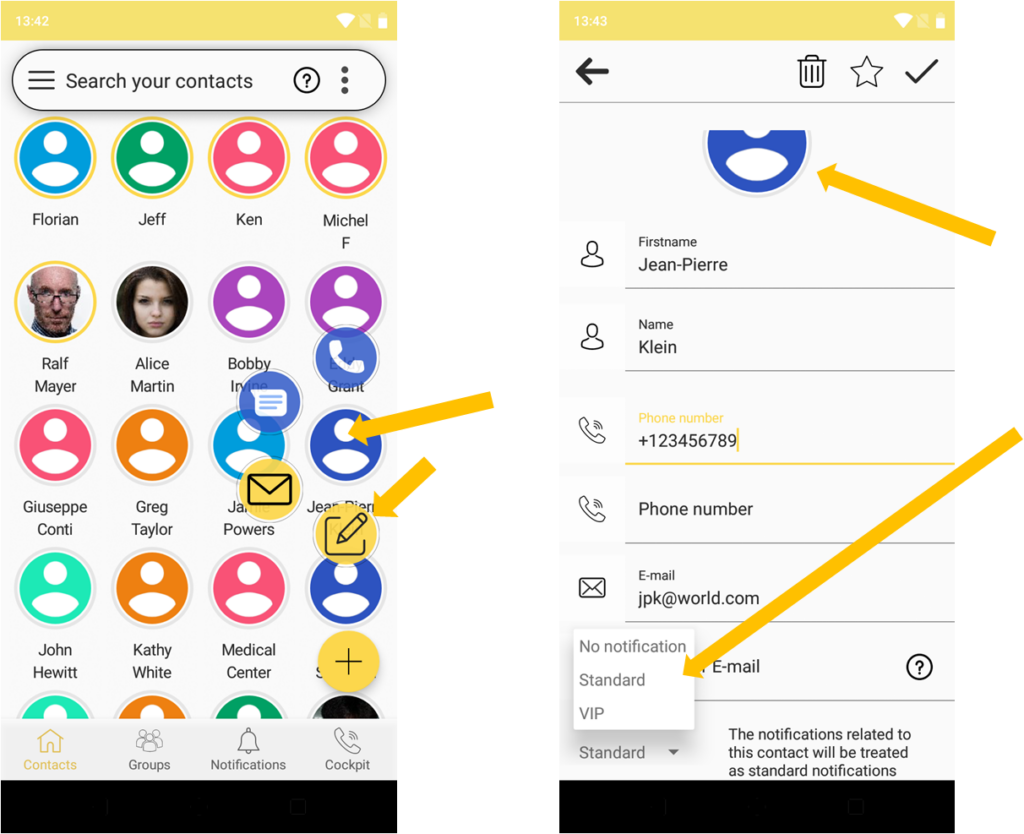
From this “contact details” screen, you can modify the various attributes. You can also add a picture as the contact icon and change the notification priority level for this contact.
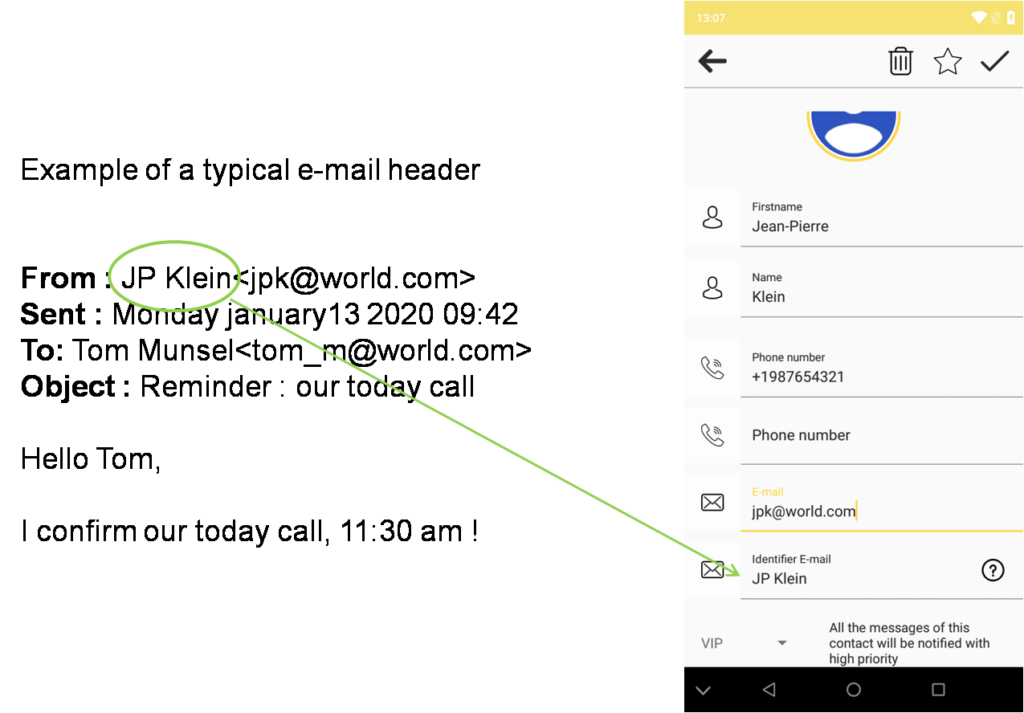
In the contact details screen, you can notice a field labelled “ Identifier E-mail”. This identifier is what you see in the “from” part of an E-mail header.
In case of e-mail messages, Android notifications only contain the e-mail identifiers, not the e-mail addresses. Knock In assistant relies on the Android notifications. So, in order to get prioritized notifications of e-mail messages from your VIP contacts, you have to indicate your VIP contacts E-mail Identifiers in the contact details (E-mail Identifiers are case and special characters sensitive) .
From the “grid view” screen, you can also very simply initiate a communication with one or multiple contacts (see below, “multiple select” function):
- A short tap on the contact icon displays the available communication applications
you can use to reach this contact. - A short tap on the icon of the selected application opens it and passes the contact identifier, so you can start composing the message.
Last, from the same screen, you can access the complete Knock In assistant menu through the navigation drawer (left to right swipe).
Knock In navigation drawer
This drawer gives you access to the various functions provided by the Knock In assistant:
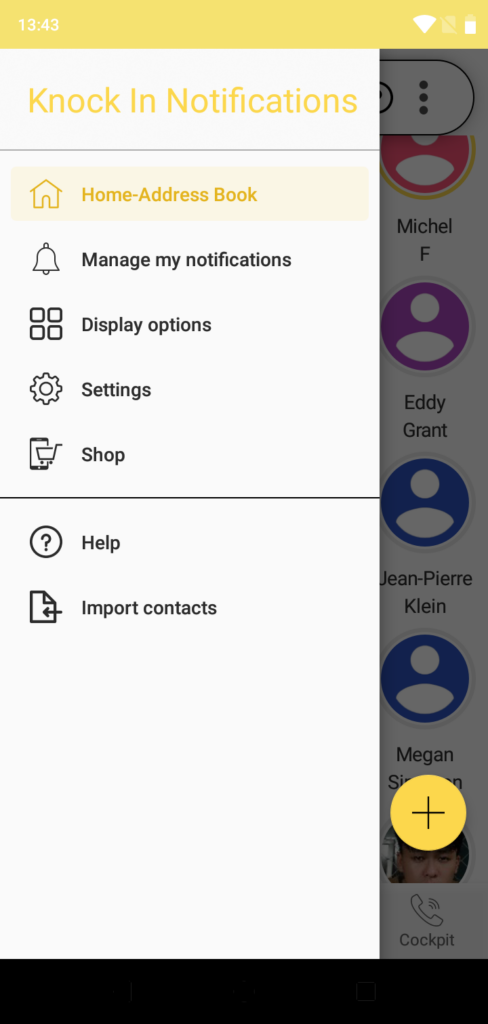
- Home-Address book: This is the landing page of the Knock In application. On this page the complete address book contents are presented in a compact grid view. From this page, you can initiate all communications with your contacts, either individually or through group communication.
From the same landing page, you can also create and manage groups. Groups created with the native Android contact manager are visible and manageable within the Knock In assistant. - Manage my notifications: from there, you can start/stop the Knock In notification prioritization function, as well as set some related operating parameters.
- Display options: this part of the menu allows you to choose the contacts display from different modes: a “grid” mode with different sizes and 2 different “list” modes.
You can also choose between a “clear” or “dark” theme for the application display. - Import contacts: in case you make changes in the native smartphone address book (add, remove, modify contacts and/or groups) this function allows you to update the Knock In application with these changes.
- Shop: the Knock In application includes some optional paid options. You can access these options directly from there.
VIP notifications display
One of the key functions provided by the Knock In assistant is to insure you get notified in real time for all messages received from your VIP contacts. Hence, the VIP notifications are displayed as intrusive pop-up windows overlaying the current application you are running on your smartphone.
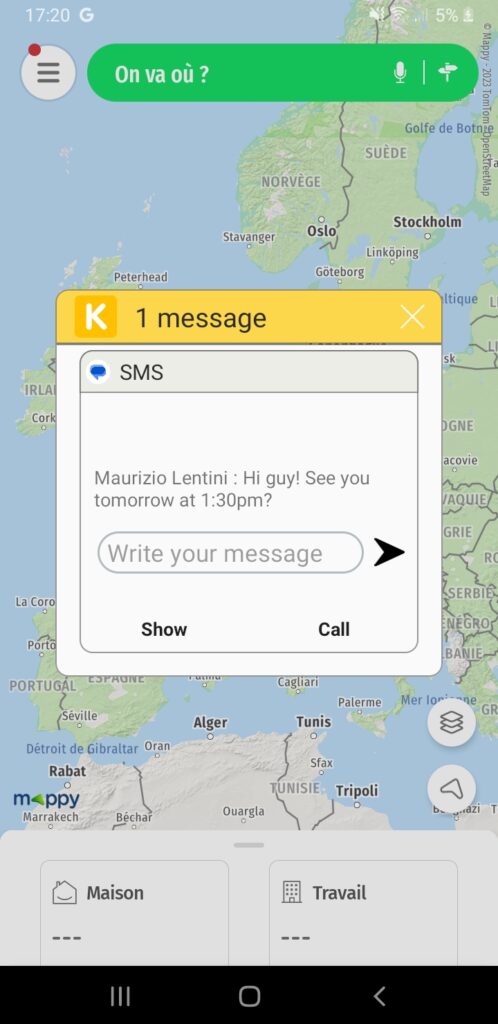
You can close the “pop-up” by clicking on the close button (top right) or with a right or left swipe of the notification “pop-up”.
You can also respond to the message sender directly from the VIP notification “pop-up” window.
After you close the notification pop-up window, you can still visualize the notification in the Knock In notifications history tab and you can respond to the sender from there as well.
As soon as notifications relate to message from your VIP contacts, Knock In informs you in real time even when your phone is in locked, sleep mode. A specific “pop-up” window awakes the phone and displays the message sender ID. As you can be away from your phone, you also get a specific ring tone along with the visual information.
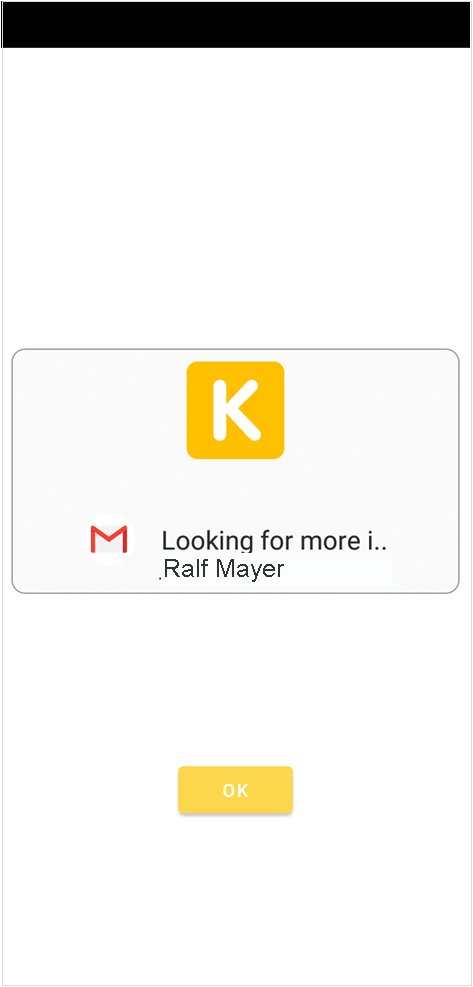
In order to optimize the efficiency of the notifications management function, it is important that you configure the SMS, Gmail client and Whatsapp so that the native notifications from these applications are sent in “silent mode”. Doing so, only the VIP notifications will be carrying a sound and/or vibration attribute.
You will be only interrupted by messages from your VIP contacts. For all other incoming messages, you will decide the appropriate time and context for handling them.
Setting notifications from your communication applications to “silent” mode
- If your phone runs with Android 9, it is very straightforward: just adjust the “notification sound” slider to minimum !
- If your phone runs with Android 7 or 8, you have to configure the SMS/messaging, Gmail, Outlook and Whatsapp applications (depending on which ones you are using) to operate in this “silent” mode through the following steps :
SMS/messaging application:
Go to the application “settings” menu -> “notifications” -> “incoming messages” -> Sound and select “none” sound.
Whatsapp application:
Go to the application ”settings” menu -> “notifications” -> “notification tone” and select “ none” ringtone.
Gmail application:
Go to the application “settings” menu -> select your mail account -> “Manage notifications” à “Sound” and select “none” sound.
Managing my notifications
This section of the Knock In main menu drawer allows you to configure the way the Knock In assistant manages your notifications.
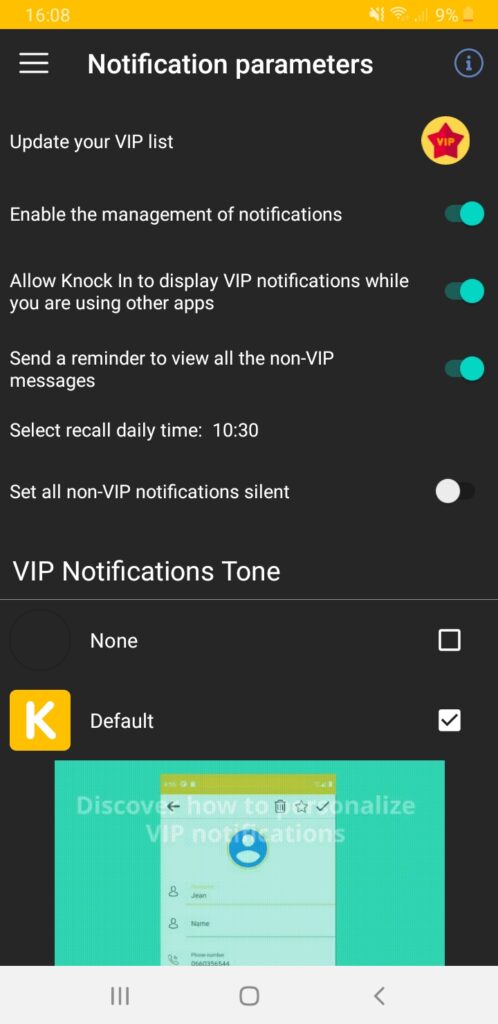
- The Knock In notification service is enabled at the first start of the application. You can temporarily disable it.
- The specific display of VIP notifications is enabled at the initial start of the application. You can temporarily disable it. While disabled, the notifications keep being logged and visible in the notification history.
- The Knock In assistant offers the option of sending you a daily reminder, for viewing all the non-VIP notifications received. You can specify the time when you want the reminder to be sent.
- You can choose the ringtone to go with your VIP notifications. Two ringtones are available natively. You can purchase additional ringtone “packs” through the shop so you can further personalize your VIP notifications !
Communicating with groups of contacts
Knock In Assistant provides flexible and powerful features for easing your communication with groups of contacts. From the Knock In landing page, go to the “groups” tab to access these functions.
Creating a group can be done very simply:
- Short tap on the add group icon
- Provide a name for the group to be created
- Select the contacts you want to be part of the group from the contents of your address book
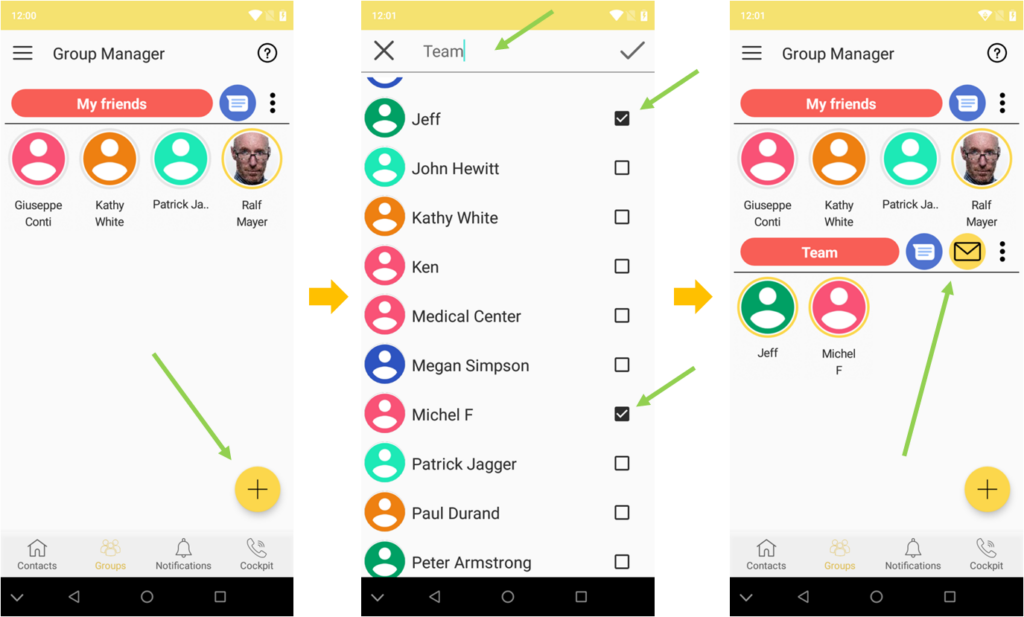
Once created, the group is visible and the display shows the group name along with the group members and the medias you can use to reach simultaneously all the group members.
Note: in the scope of this first version of the Knock In assistant, the medias for group communication can be only SMS/Messaging and/or e-mail.
Sending a message to the group is done very simply, just with a short tap on the media icon you want to use (icons right to the group name): you will be directed to the message composition screen.
In some situations, you may only want to have a “one shot” communication with a group of contacts. Thanks to the “multi select” feature, the Knock In assistant allows you to do so in a very easy and straightforward way, skipping the group creation operation.
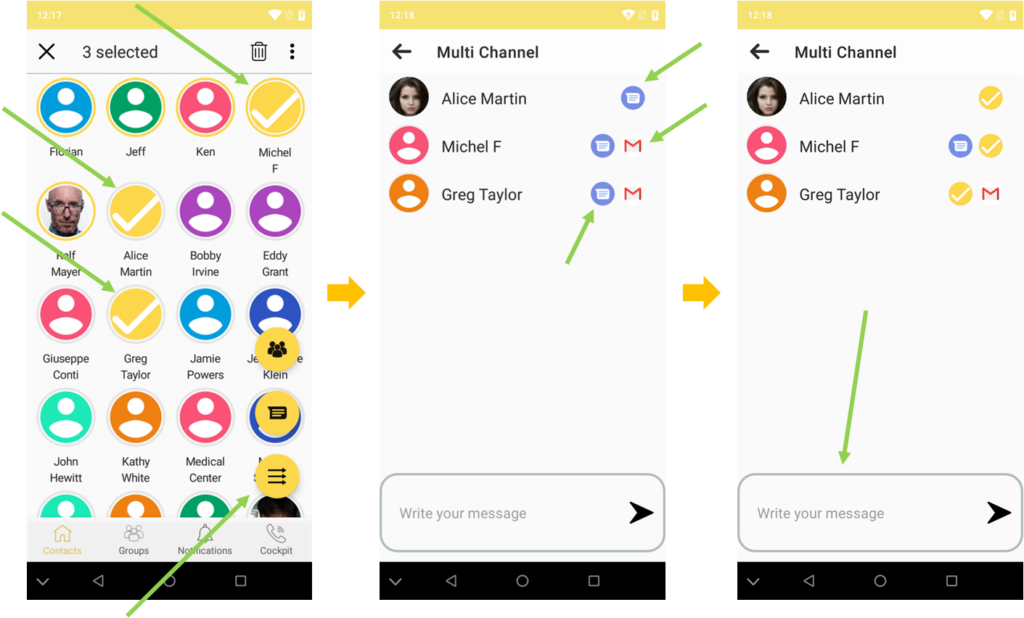
- Directly from the contacts view, select through long tap the contacts you want to communicate simultaneously with.
- The Knock In assistant indicates the common communication channel that can be used to reach all the contacts. You can select the channel that suits your needs.
- In case a single communication channel cannot reach all the selected contacts, the Knock In assistant allows you to send the same message simultaneously through different communication channels (sms, e-mail). To do so, just short tap the “multi channels” icon.
- Your communication assistant with then display the medias available for each of the selected contacts: just pick up the appropriate media for each of the contacts, then type in your message !

